For a few years now I've been buying my cousin little boxes for Christmas. Just little things I might find at antique stores or flea markets. But I want them to be unusual - something you might never see anywhere else. Usually older items that contain craftsmanship not used any more. Previous ones were a small box of solid marble. A wooden box with mother-of-pearl flower inlays. A hand-made stained glass box with a shell embedded into the top as part of the glasswork.
So I saw this brass jewelry box in October. I liked the decorations on the lid, and the unique two-compartment opening, so I picked it up.

It didn't really look bad. A nice patina on it. Could have been a nice gift as is. Except. In the upper right there was some dirt. I didn't think it would be hard to remove. but when I did remove it - underneath was shiny. The dirt has protected the finish. Now I had a nice shiny bright spot. There was no choice but to clean the whole thing.
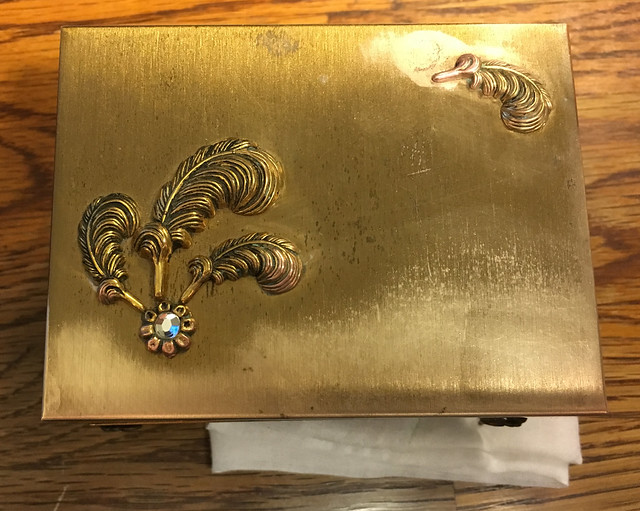
So some Brasso and elbow grease, I started. (At least I had a few months to work on it). You can see above the bright shiny spot in the upper right. The front (bottom of the photo) shows me beginning work.
So lots of on-and-off working on the box for the next 2 months. The top was easiest. Q-tips and toothpicks helped clean the two feathers. The box edges were a challenge working round the hinges. And of course trying to polish the piece but not damage the delicate feet. There were some places that I couldn't get clean. A friend recommend using some thinner - turns out they still had their protective coating on those spots, so thinner cleared most of those spots off.
Also a thanks to the folks at North Bennett. I took the box to their open house and got some helpful recommendations. They steered me to NevrDull to give it a second round of polish after the Brasso. They also recommended Renaissance Wax as a sealer. Just handling the box was turning into a problem, as just my fingerprint oils would leave tarnish marks after a few days. My friend Sarah gave me some medical gloves that I used for now on so I wouldn't un-do my polishing efforts.
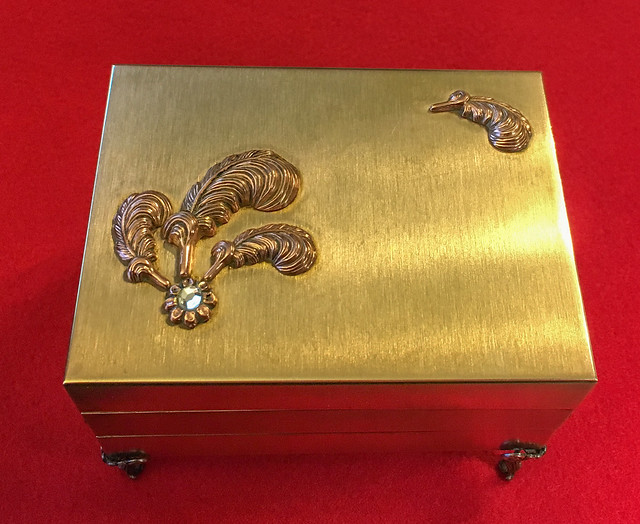
Once polishing done, several coats of Wax and we were good to go.
Of course, the best part of hard work is giving it away. She absolutely loved it! Made all the hard work worth it.

Some more photos can be found on my Flickr album
Tools used: Brasso, NevrDull, Renaissance Wax, soft cloths, Qu-tips, toothpicks, medical gloves.
Warms my heart!! Leann
ReplyDeleteWarms my heart!! Leann
ReplyDelete